Background
I taught myself how to build native iOS apps in the early months of 2015, when Swift 1.0 had only recently been released. It was tough. When I chose Swift, I had no idea how tall the mountain I'd chosen to climb actually was, as the peak was hidden beyond clouds of hope and naivety. Apparently, new languages come with small online communities, and not a lot of people on StackOverflow are giving detailed enough answers for someone with no knowledge of the underlying programming concepts to understand. Swift was also getting frequent updates, so even comprehensive answers came with bugs I couldn't fix if they were more than a few months old. I also knew 0 people with any semblance of programming knowledge who I could turn to for help. At the time, I was an accountant for a biotech company and the sad reality of adulthood meant all my friends were accountants and scientists. To make things even worse, my biggest challenge at the time was adding music playback controls to my first app, making the majority of my google searches return articles about the ongoing drama surrounding Taylor Swift removing her content from Spotify.
As such, I had to rely heavily on documentation and just figuring things out. Apple docs literally became my late night reading.
What I didn't know at the time was that all of this was actually turning me into a "good" developer who could do things like...rely on documentation and figure things out.
However, the day finally came when I accidentally realized I was "good" at programming, and this developed...hubris. I started to believe that I had "done my time", and now all that was left was to do the crimes.
The Problem
Because I was an app developer who hadn't yet realized how transferrable a lot of my knowledge was to other tech stacks, I built my portfolio with Squarespace. There was nothing wrong with this and it was a good portfolio. It even landed me my first dev job after I linked it in my cover letter while applying for an accountant position at a software company that ended up seeing more value in my programming skills than I did.
Before switching careers entirely, I began freelancing since 2016, and still do. I find most of my clients through Reddit, and one of my recent r/forhire posts got a comment asking why a full stack developer has a portfolio "Powered by Squarespace". My response was simple and only had 3 points.
- If it ain't broke don't fix it.
- Most of my clients are simply individuals with an idea, some money, and limited technical knowledge, so there's no real need to impress them with a portfolio that can be analyzed on github.
- If I'm going to write code, I'd rather be writing the code that's actively making me money.
However, that comment sat around in my head for a while, and I figured the time had finally come to build a portfolio project. I've been trying to catch bigger fish these days and it might be helpful. I've also gotten to know some other devs that I could potentially subcontract for larger projects, so a fresh website could look a little more agency-ish.
The Solution
After creating a react app and building a single component (which we'll get back to), I decided to restart with Next.js for a few reasons:
- I've been telling potential clients I can do this, so I might as well make sure
- It works via server-side rendering, which I hadn't worked with yet, so it would be good to get more familiar with the concept
- It's "essentially just React", and I've been using that for 6 years, so it should be easy, right?
- It's apparently better for SEO when compared to React
How It Went
This would be a good time to clarify that the use of the term postmortem in the title is a joke, but I'm also writing this article as I build the project, so we'll see.
Like any "good" developer, I ~~read the documentation~~ went straight to the get started page to find the CLI command to create a new project and figured I could just take it from there. On the installation page, I found the command:
npx create-next-app@latestAnd answered the questions:
What is your project named? my-app
Would you like to use TypeScript? Yes
Would you like to use ESLint? Yes
Would you like to use Tailwind CSS? Yes
Would you like to use `src/` directory? Yes
Would you like to use App Router? (recommended) Yes
Would you like to customize the default import alias (@/*)? Yes
What import alias would you like configured? @
Great, I officially have a working Next.js website and the résumé has been reformatted to allow room for another bullet point on the skills list. Check and check.
But wait, it actually like I've already made a mistake here. Hmmm...can you spot it? That's right! It was saying yes to Tailwind.
Looking at src/app/page.tsx, I was immediately assaulted with the following:
<div
  className="relative z-[-1] flex place-items-center before:absolute before:h-[300px] before:w-full before:-translate-x-1/2 before:rounded-full before:bg-gradient-radial before:from-white before:to-transparent before:blur-2xl before:content-[''] after:absolute after:-z-20 after:h-[180px] after:w-full after:translate-x-1/3 after:bg-gradient-conic after:from-sky-200 after:via-blue-200 after:blur-2xl after:content-[''] before:dark:bg-gradient-to-br before:dark:from-transparent before:dark:to-blue-700 before:dark:opacity-10 after:dark:from-sky-900 after:dark:via-[#0141ff] after:dark:opacity-40 sm:before:w-[480px] sm:after:w-[240px] before:lg:h-[360px]"
>
  ...
</div>
Honestly, what the fuck is even this? This is the most disgusting thing I have ever seen. This is ONE LINE of code? Sod off, mate. I even had to add some css to make this code block wrap the text so you wouldn't have to scroll horizontally for 5 minutes. If I saw this in a code review, my eyes would immediately skip to the next line because it lgtm, and I highly doubt I'm alone here. The next time I hear someone say that inline styling is messy and makes the code unreadable, I'm going to stick my finger down my throat and vomit this line of code all over their shoes.
It's also apparent that there's some Tailwind-specific fuckery going on here, which means I'll need to read some docs, so no thanks. I'd rather spend my time getting better at actual CSS, which has now become a tertiary goal of this project for nothing but pure spite.
So, let's delete this project and rerun rhat CLI command with some new answers. But first, I actually stumbled upon this Portfolio Starter Kit in the templates section that offers the following:
- MDX and Markdown support: Cool!
- Optimized for SEO (sitemap, robots, JSON-LD schema): Awesome! That's exactly why we're here in the first place. And robots? The future is now!
- RSS Feed: Neat!
- Dynamic OG images: I don't know what this means, but I always keep it OG, so this is a clear win.
- Syntax highlighting: Fancy!
- Tailwind v4: Uh Oh.
- Vercel Speed Insights / Web Analytics: I dunno, seeing how many people actually visit my website sounds depressing.
- Geist font: So hot right now!
Sounds like this should save me a bunch of time (except for having to copy/paste a new CLI command). Let's get started and run this project.
I was immediately hit with an error about the React version not being high enough (which, oddly enough, I couldn't replicate to provide the exact error here). Easy enough fix, I can just update the React version, but what if this causes version conflicts with other packages? And what if resolving those other version conflicts breaks the example code? Then I'll have to start googling things? Sounds like a lot of work.
Let's just scrap this entirely and go back to the regular create-next-app command and maybe I can look at the template code to integrate what it's doing with SEO. Cool, we're back at square one. Sure, some time was wasted, but not as much time as reading a doc, right?
The next step here was to open youtube and see that Theo just posted a new video about something called server islands by astro that, according to the thumbnail, will eliminate ssr, ppr, spa, and isr (I know what 2 of these things mean, server-side rendering and single page application, while Theo's video tells me ppr means partial prerendering, and google tells me isr means infant swimming resources). Welp, fuck me I guess. I do plan on having at least 2 client-side components on this website and this might affect the performance of those components. ...this sounds like a problem for another day, and the jury is hereby instructed to disregard this paragraph, as it is inadmissible.
You know what? I just thought of a quick way to check if I can get around that react error in the template without having to go through all those potential steps I mentioned. Let's create it again, delete all the dependencies, then run a single command to just re-add them all and see if it runs.
The only issue I faced here was with the 2 Tailwind-related packages. Who could've guessed. What a package. 10 stars all around. I manually reset these versions, reinstalled, ran the project, and we're good to go!
At this point, as I now had a working website with a blog, I figured it was time to start writing this article, and here we are. I'm already worried this article will have major issues with verb tense consistency, so hopefully you can understand that this is just a race condition, as the project and the writing are operating concurrently.
So now we have a website that looks like this:

Whoops, it looks like I'm having trouble getting this image to display here. I added the image to a new assets folder within the existing blog folder and tried
but nope. I thought this was how markdown worked? I've been a Redditor™ since before I was a dev, I should know this.
nope
I think I saw that .mdx files are markdown files that supports components?
<img src="app/blog/assets/InitialHomePage.png" />nope
<Image src="/../assets/InitialHomePage.png" ... />nope
I turned to Chat-GPT and got some nonsense that didn't work. Then some googling told me I should put the image in the public folder. Duh. This is something I kind of knew but I'm used to React and Expo doing this for me during the build process. If this template had included a public folder, it would have been fairly obvious from the start. So much for OG images (I still don't know what this means). I created a public folder and moved the image to public/assets/blog/nextjs/InitialHomePage.png and tried
We did it! So now we have a website that looks like this:

Unfortunately, a screenshot of nothing but Geist font kind of blended into a blog post full of Geist font, so I decided to test out the components-in-mdx "theory" with some css
.bordered-image {
  border: 1px solid;
}
and then tried adding that img component again
<img
  src="/assets/blog/nextjs/InitialHomePage.png"
  alt="Initial Home Page"
  className="bordered-image"
/>
Cool beans, m'queens. *tips fedora and rides off into the sunset before turning around to tell you that you may not notice the problem or the solution if you are viewing the page in light mode*
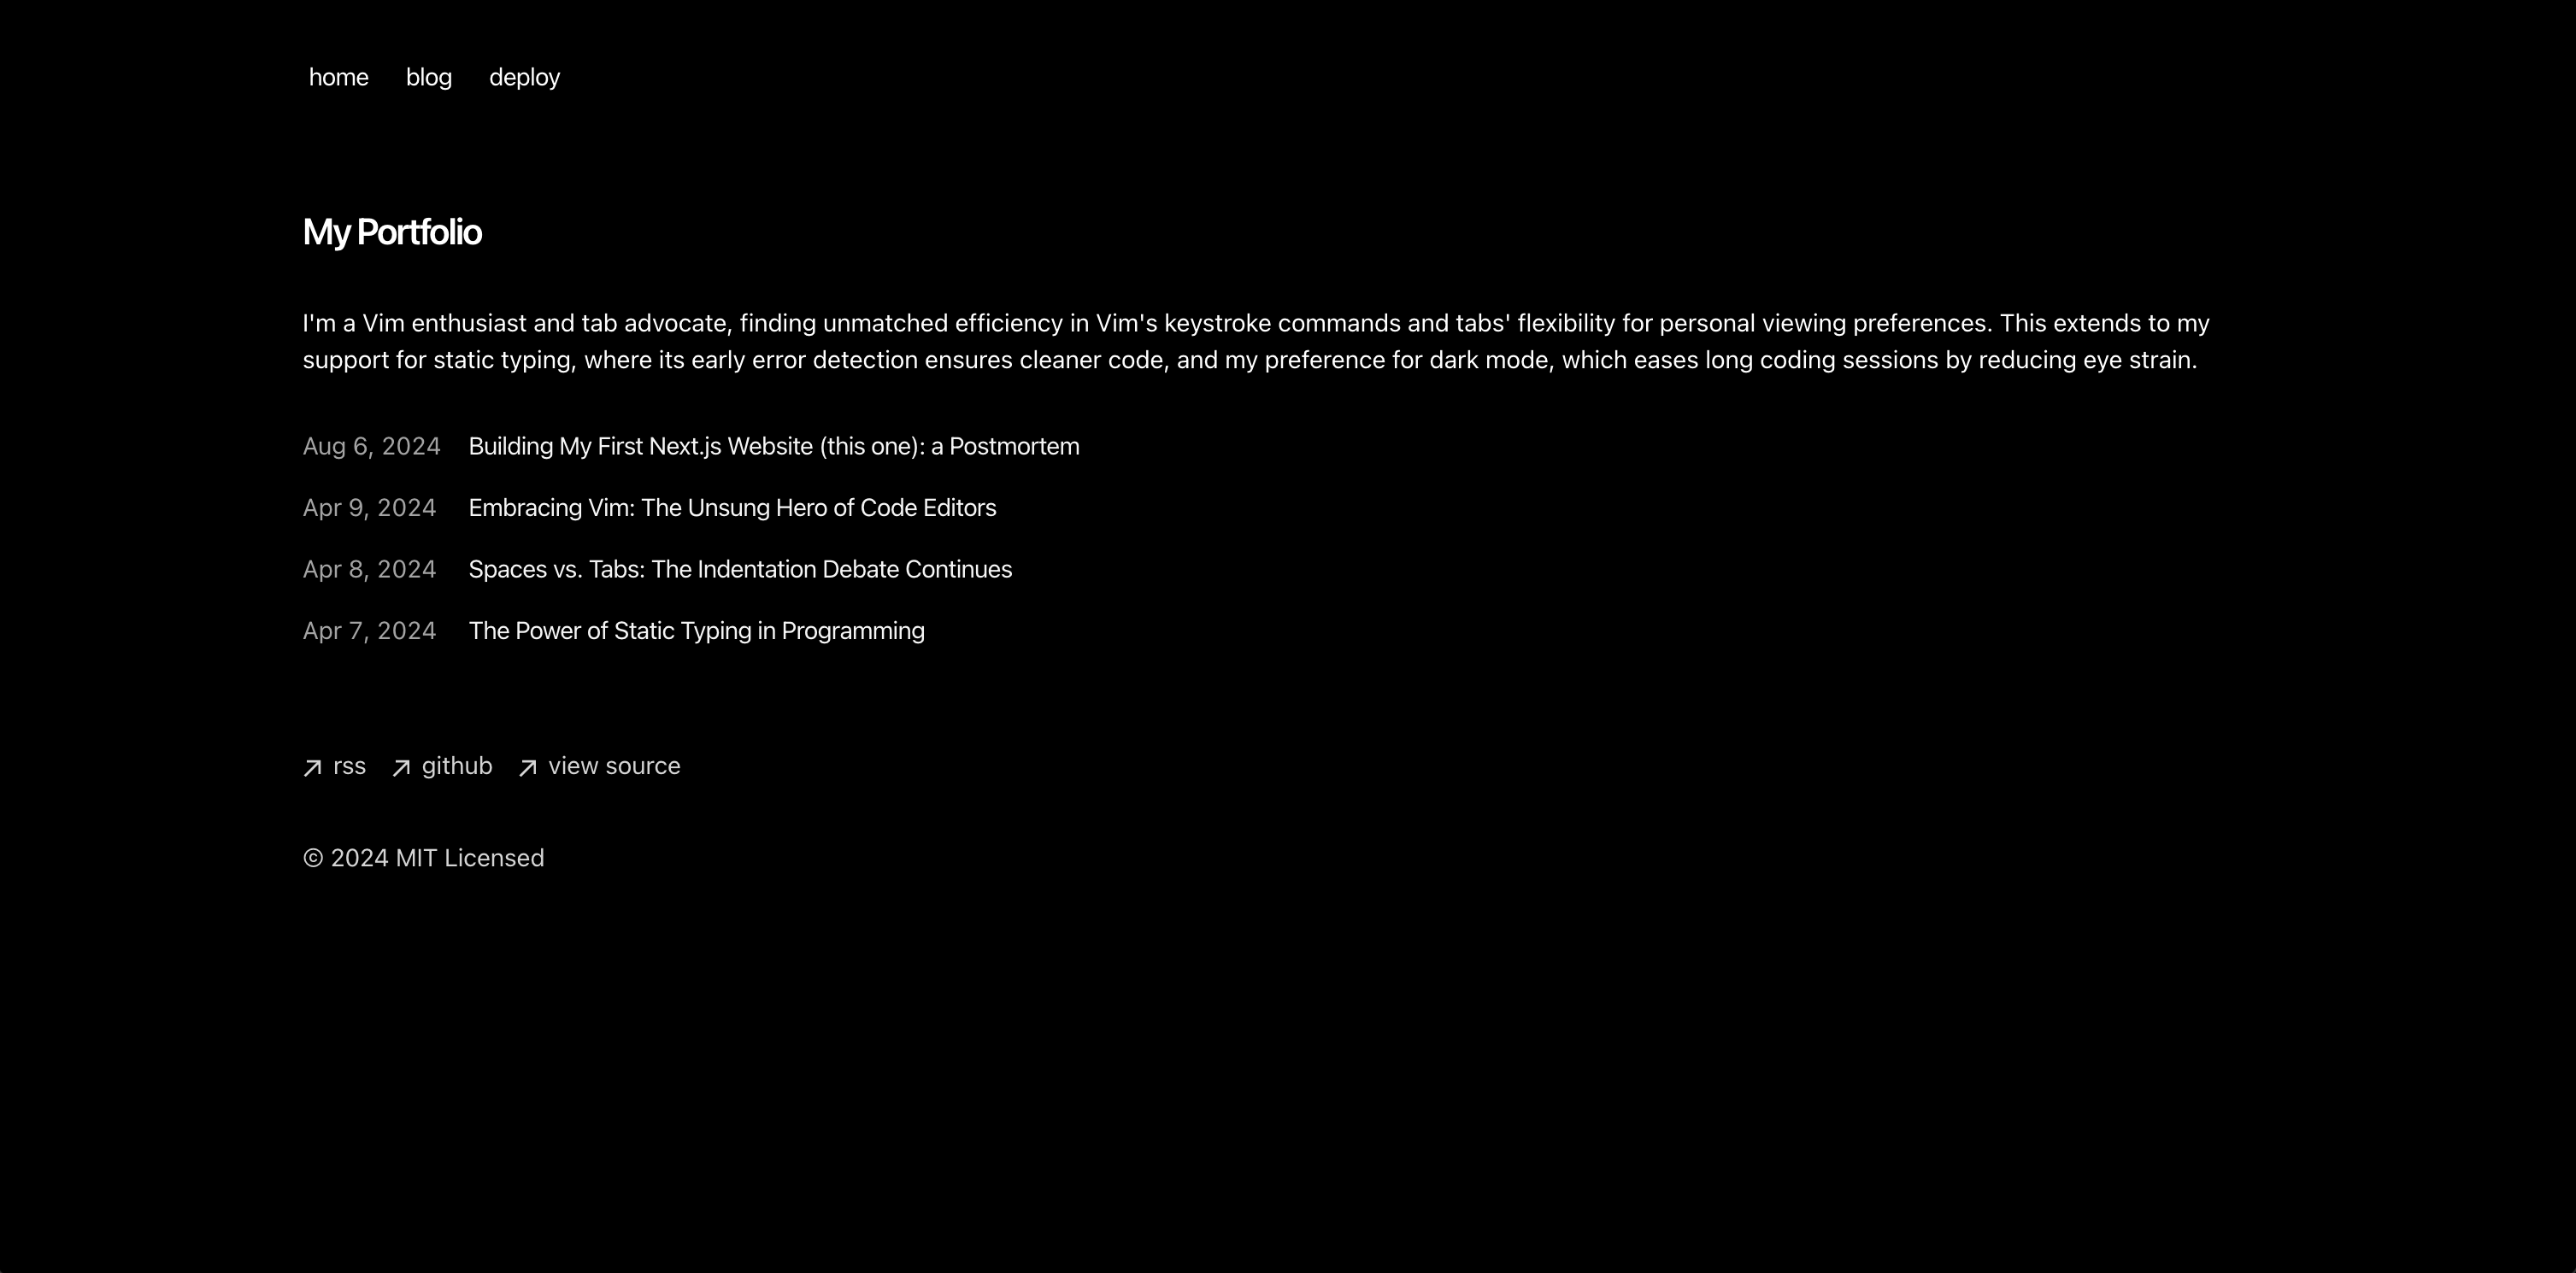
So, the first thing I don't like about this home page is the wrapping text on the date for this article. It's kinda gross. I also obviously have to replace all this default content from the template. Not only is it not my content, but I'm not about to enter a one-man circle-jerk about vim *cough* Primeagen *cough*. While I do prefer tabs over spaces, it's only because I can tab 4x faster than I can space space space space, but if it looks the same and the machine reads it the same, I don't really care about your preference. Type safety is cool though, maybe I'll steal that post.
Another thing I don't like is how it looks on a full page.

This is way too small, so I did some hunting and found the offending code hiding out in app/layout.tsx
<body className="antialiased max-w-xl mx-4 mt-8 lg:mx-auto">...</body>Luckily, the one part I can immediately understand here is the one that mattered, max-w-xl. Let's try changing that to xxl? Well now it just fills the entire page with no margin, which means either xxl doesn't exist or Tailwind has made some really weird scaling decisions. I kinda wanna see if Tailwind is smart so I do some quick testing with max-w-800 and max-w-800px with no result. So let's just remove that and do some actual CSS.
html {
  min-width: 360px;
  padding: 0 2rem;
}

body {
  max-width: 1280px;
  align-self: center;
}
Great, now everything visually works how I want it to. *finger guns* *click* oops, no ammo. That's right, we still have to fix that wrapping date text. Let's take a look at the existing code.
{
  allBlogs.map((post) => (
    <Link
      key={post.slug}
      className="flex flex-col space-y-1 mb-4"
      href={`/blog/${post.slug}`}
    >
      <div className="w-full flex flex-col md:flex-row space-x-0 md:space-x-2">
        <p className="text-neutral-600 dark:text-neutral-400 w-[100px] tabular-nums">
          {formatDate(post.metadata.publishedAt, false)}
        </p>
        <p className="text-neutral-900 dark:text-neutral-100 tracking-tight">
          {post.metadata.title}
        </p>
      </div>
    </Link>
  ));
}
The quickest and easiest solution here that still looks good is to change w-[100px] to w-[115px] in the first <p> component and make sure not to write any articles on future dates that might require more characters. But then I noticed the formatDate function has the following localization logic:
let fullDate = targetDate.toLocaleString("en-us", {
  month: "long",
  day: "numeric",
  year: "numeric",
});
So I changed month: "long" to month: "short". And with that, the finger guns are fully loaded and we have a future-proof website layout that looks like this:
So now we need to actually turn this into a portfolio. Instead of using the current home page, I want to create a new "projects" page and eventually turn the home page into a landing page (because I'm an agency now). The first step here will be to figure out how the template is managing the header, slugs, and routing.
I notice the nav bar has the following:
const navItems = {
  '/': {
    name: 'home',
  },
  '/blog': {
    name: 'blog',
  },
  'https://vercel.com/templates/next.js/portfolio-starter-kit': {
    name: 'deploy',
  },
}
and the project has a file structure like this:
project-root/
├── app/
│ ├── blog/
│ │   └── page.tsx
│ └── page.tsx
So it looks like I can just create a new /app/projects/page.tsx file and add a /'projects': { name: 'projects' } record to the navItems and a quick test confirms this to be true. Yay, programming is easy! Please ignore the fact that I didn't actually "figure out how the template is managing the header, slugs, and routing" and instead just figured out how to manipulate the end result. Was the under-the-hood magic here provided by the template? Or is this boiled into Next.js? Who cares! I did the thing I had to do and the most efficient thing to do now is do the next thing I have to do.
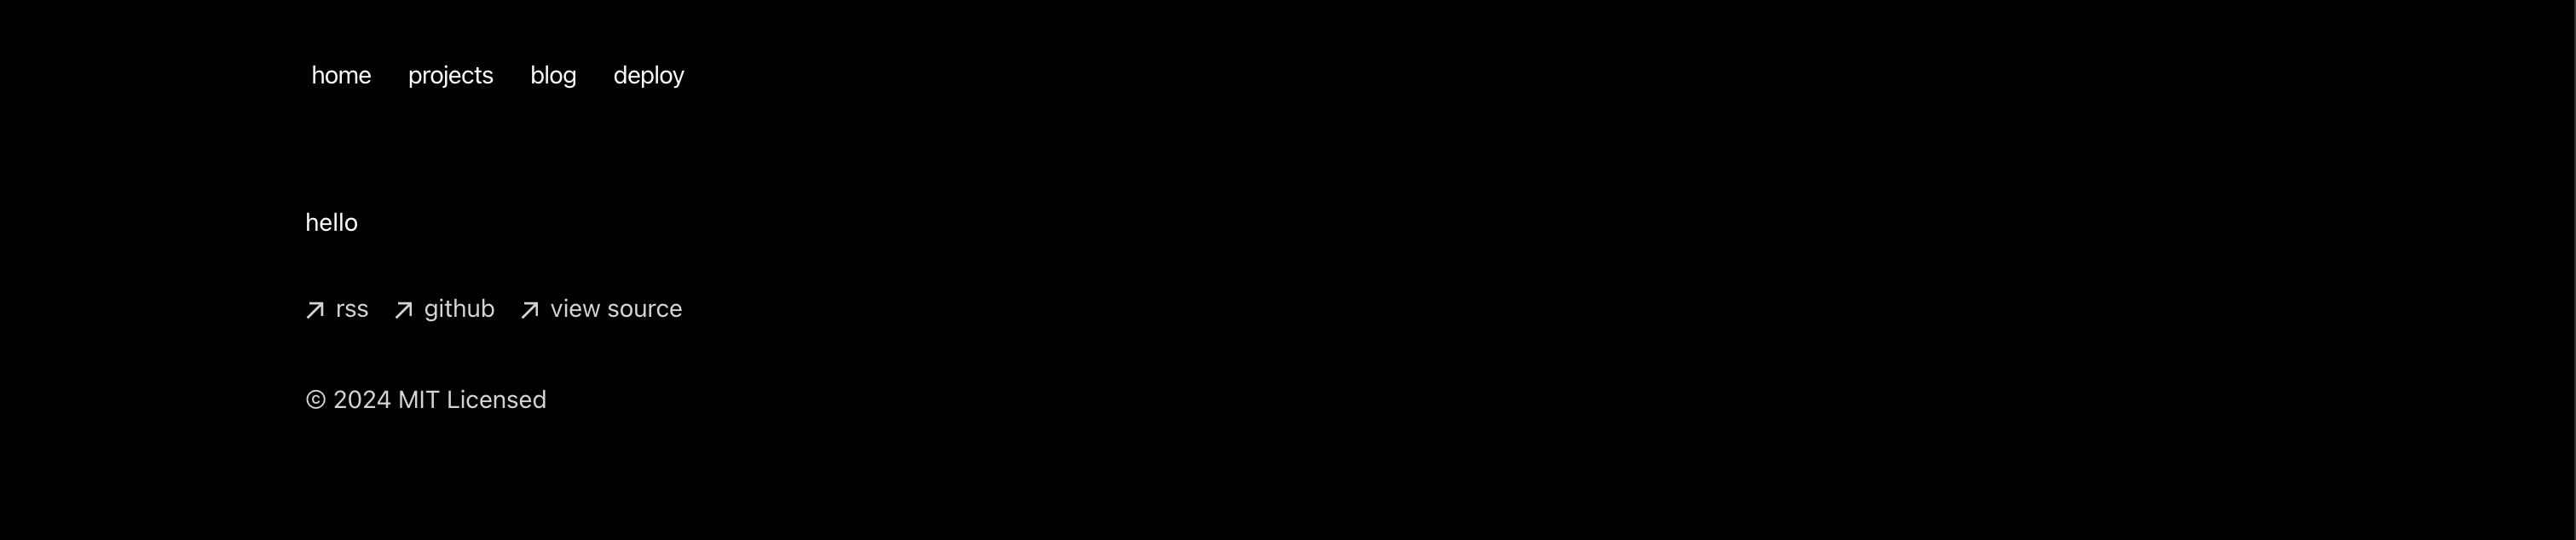
The next thing I have to do is scaffold out a grid of labeled images that link to dynamic urls. Right now, my test code looks like this:
// app/components/portfolio-grid.tsx
export default function PortfolioGrid() {
  return <section>hello</section>;
}
// app/projects/page.tsx
import PortfolioGrid from "app/components/portfolio-grid";
export default function Page() {
return <PortfolioGrid />;
}and a page that looks like this:
And after some quick scaffolding, we have some code that looks like this
// app/components/portfolio-grid.css
.grid {
  display: grid;
  gap: 1rem;
  justify-items: center;
  grid-template-columns: repeat(2, 1fr [col-start]);
}

@media (min-width: 750px) {
  .grid {
    grid-template-columns: repeat(3, 1fr [col-start]);
  }
}

@media (min-width: 1000px) {
  .grid {
    grid-template-columns: repeat(4, 1fr [col-start]);
  }
}
// app/components/portfolio-grid.tsx
import "./portfolio-grid.css";
export default function PortfolioGrid() {
return (
<section>
<div className="grid">
{[1, 2, 3, 4, 5, 6, 7, 8, 9, 10].map((x) => (
<div key={x}>
<img
// picsum.photos is a handy service called "lorem picsum", a lorem ipsum resource for images
// '/300` pulls in a 300x300 image
// '?random=${x}' ensures it calls a new image each time instead of the same cached image
src={`https://picsum.photos/300?random=${x}`}
alt={x.toString()}
/>
<div>
<p>Project {x}</p>
</div>
</div>
))}
</div>
</section>
);
}and a portfolio page that looks like this:
Now for the part I've been dreading the most...manually copying over the images and content from Squarespace...just a big, fat, juicy chunk of time-consuming non-work. Sounds a lot like my entire accounting career smh. In total honesty, this is the one step that's prevented me from making my own portfolio project for many years, as my brain had successcfully petitioned itself for multiple stays of execution. But everyone has their day, and today is mine.
Rocket League break? Rocket League break. I'll report back in a few days

So now we have a portfolio page that looks like this:
Because I pledged to get better at CSS earlier, you'll notice some cool CSS animations going on here. There's a neat little progress wheel in the upper right corner that fills up as you scroll through the page (this is unfortunately and requires a js script). On larger screens, it also has an inner text element that shows 0-100%. Btw I'm color blind so I hope I picked an ok color here. Additionally, hovering over an item triggers 3 actions in pure CSS: the item's border radius is set to 50%, the label's opacity is set to 0, and the image's scale is set to 1.75. I particularly enjoy how this looks in dark mode, as the box-shadows almost make it look like you're peering at the image through a porthole window and it makes me feel like a pirate. Unfortunately, this effect doesn't really present itself in light mode. You'll also notice the first component I mentioned I'd built in react. I thought it would be cool if the image for "this website" in the portfolio was actually a screenshot of the page itself, and it is cool! This works with html2canvas and originally had scroll and resize listeners to re-capture the visible window and act as kind of a live view of the page itself. This was kind of glitchy and laggy, though, so I tried adding a 300ms debounce to the capture function, which means every time the function is called, it waits 300ms to make sure it hasn't been called again before running. This made it less glitchy but it was still laggy and didn't at all represent the "live" view I was looking for. Wait a minute, don't I already have a js script that can update CSS properties based on the page's scroll position? Cool beans. I removed the scroll listener from the component while leaving the resize listener, updated the html2canvas function to capture the full height of the document body, and added some code to the js script that updates the image's object-position property from `"50% 0%" to "50% 100%". Now we're cookin' with gas. Look at that smooth animation 😍! html2canvas does, however, have trouble capturing all the css properties so it occasionally looks a little silly, and I'm still trying to decide how I feel about that. I saw there's a package for screen recording and presenting a live preview of that live screen recording, but I worry that's a little heavy.
I'm sure some of you would like to see all of this code I just talked about, but this is a blog post about next.js and not a tutorial on building this specific website, so I'll only be sharing the relevant bits, which sucks for you.
Now, this did not come without issues. After copying over the html2canvas component I was hit with Error: × You're importing a component that needs useState. It only works in a Client Component but none of its parents are marked with "use client", so they're Server Components by default. Learn more: https://nextjs.org/docs/getting-started/react-essentials. Ok this sounds easy enough, but what exactly am I supposed to do? How do I mark a component with "use client"? And is this implying I need to add it to a parent component, or can I add it to the component itself? Should I click that link and do some reading? Nope! ChatGPT actually came in clutch here and told me I just needed to add "use client"; to the top of the file in question. Blast off.
I also hit a very confusing problem where I was unable to deploy the project to vercel because it couldn't resolve the html2canvas module. Huh? It's working locally. What gives? Is there a specific compatibility issue between vercel and html2canvas? Maybe I should try changing my local node version to what vercel is using and see if I can still run it. Yep. Hmmm. I'll try adding @types/html2canvas. This didn't fix the issue and I was also warned by the package manager that html2canvas is already typed and the @types package is unnecessary. Now here's where it gets really confusing...the answer was the most obvious one. When I copied the component over from the old react project, I failed to add the package to the new next.js project. Then why the hell was it working locally? Maybe my computer was confused because the old project used to sit in the same directory as the new one before I renamed it to "project-name-old"? Or maybe I accidentally installed the package globally at some point? Who knows? Not me. The problem is solved and the time for inquiry has passed.
The third issue I faced was adding the above gif to the project, because it was over 100mb, which meant I had to spend precious minutes following the instructions to set up git lfs (large file storage). Such a pain. This required AT LEAST (exactly) 2 terminal commands. I admit I'm being a little facetious here, but this is called context switching, which, according to some studies, means this task actually wasted an hour of my time.
It's now time to admit that I have sold you a lie. I still have not copied all the content from the Squarespace site, but this post can't be published until the website is done, so let's just pretend. I think I'd rather work on the landing page right now anyways. With some cool CSS stuff obviously.
Actually, I think it's maybe time a little SEO work. I've noticed that the page titles displayed in the tab say "Next.js Portfolio Starter", the blog page says "Blog | Next.js Portfolio Starter", the blog post pages say "Post title | Next.js Portfolio Starter", but my newly added Projects page just says "Next.js Portfolio Starter" without the "Projects | ...", so lets look into what's going on here and see how we can manipulate it.
There's some code in the app/layout.tsx file that looks like this:
export const metadata: Metadata = {
  metadataBase: new URL(baseUrl),
  title: {
    default: "Next.js Portfolio Starter",
    template: "%s | Next.js Portfolio Starter",
  },
  description: "This is my portfolio.",
  openGraph: {
    title: "My Portfolio",
    description: "This is my portfolio.",
    url: baseUrl,
    siteName: "My Portfolio",
    locale: "en_US",
    type: "website",
  },
  robots: {
    index: true,
    follow: true,
    googleBot: {
      index: true,
      follow: true,
      "max-video-preview": -1,
      "max-image-preview": "large",
      "max-snippet": -1,
    },
  },
};
and the app/blog/page.tsx file has some code that looks like this:
export const metadata = {
  title: "Blog",
  description: "Read my blog.",
};
and the app/blog/[slug]/page.tsx has some code that looks like this:
export function generateMetadata({ params }) {
  let post = getBlogPosts().find((post) => post.slug === params.slug);
  if (!post) {
    return;
  }

  let {
    title,
    publishedAt: publishedTime,
    summary: description,
    image,
  } = post.metadata;
  let ogImage = image
    ? image
    : `${baseUrl}/og?title=${encodeURIComponent(title)}`;

  return {
    title,
    description,
    openGraph: {
      title,
      description,
      type: "article",
      publishedTime,
      url: `${baseUrl}/blog/${post.slug}`,
      images: [
        {
          url: ogImage,
        },
      ],
    },
    twitter: {
      card: "summary_large_image",
      title,
      description,
      images: [ogImage],
    },
  };
}
etc. etc...
So it looks like the layout page outlines the initial metadata and each page can override whichever value(s) it wants to, which is pretty nifty, and confirmed through testing to be an accurate assessment. After some modifications, the Projects page tab now says "Projects | LogicaHaus"
Ok, back to the landing page, which has been completed without much need for discussion here, as none of the work was specific to Next.js. It did take a lot of time, as I added quite a few CSS animations, some built from scratch and some shamelessly stolen and modified. I also refined the html2canvas code a bit added a Calendly integration for "Book Now" call to action button for consultations.
The next step was to build out the contact page, which did involve some Next.js specific logic, so let's discuss. The first step was to add the consultation booking button again, easy peasy. After building out a contact form, I looked into having it send me an email, but after looking at the available solutions, they lift me feeling a bit icky. While, sure they were free to start, they would eventually cost money at scale. The setup also required me to have an existing smtp to connect to. I didn't really want to set this all up, and while I do have one for my existing website, it's managed by my Squarespace subscription, and I didn't really want to dig into all that either. I also especially didn't want to do this work twice just so I could test it now. I decided instead to create a Slack bot that would send the form data to a specific channel, which was surprisingly easy to set up with the guides provided by slack.
According to ChatGPT, in order to get this to work, I needed to create an API endpoint that I could call from the contact page to interacts with the slack API. I followed its instructions, which included creating a new pages/api/contact.ts file, adding some code, and then calling /api/contact from the contact page. Unfortunately, I ran into issues. http://localhost:3000/api/contact can not be found. Navigating to the url in the browser also returns a 404. I thought maybe this was because my project's current router looked like /app/page-name/page.tsx/ and not pages/page-name.tsx. So I tried adding the contact.ts file in a few different places to no avail. I also tried calling relative paths from the page like ../api/contact or ../../pages/api/contact, but again with no luck. I begrudgingly went to the Next.js docs and found the exact same instructions. The example told me to create pages/api/hello.ts and paste the example code. Same issue, same attempts to fix, same headache. Maybe the template I copied was missing some npm package that was necessary for API processes to work? This lead me nowhere. Googling the problem led me to multiple StackOverflow discussions that gave different solutions, but they were all a few years old and none of them worked. Maybe it just doesn't work on localhost? I committed what I had, waited for Vercel to build it, and tested it on the production build, and guess what! It still didn't work (probably because I hadn't thought to set up the new environment variables in Vercel). After some additional rounds of frustration, I decided to cancel the currently running dev build, run yarn build, and then run yarn start. This seemed to actually fix the issue, and it still worked later when re-ran yarn dev, and it also suddenly started working on new Vercel build (probably because I had thought to set up the new environment variables). Ok, problem solved, I'm now getting messages in my slack channel and my super mega award-winning client pipeline is complete.
And with that, the project is pretty much done! All that's left is to buy the URL and hook everything up. Vercel actually made this pretty easy. I bought the domain from NameSilo (for much cheaper than I almost bought it for from Squarespace), added the new domain in Vercel's domain settings page, and it told me exactly which existing DNS records needed to be removed and provided the ones I needed to add.
Final Thoughts
All in all, I didn't end up facing that many issues that were specifically related to Next.js, at least no more than I would have encountered with just React, and now I'm worried this post is boring, or at least misleading.
After working through the entire template, I started to become a bit more familiar with the Tailwind syntax and I hate it a little less. I even utilized it a few times when I didn't want to bother navigating to a new file to create a CSS class. However, I don't really see the benefit over learning Tailwind's syntax over just learning CSS. Even with the argument I just made about it being a little easier than creating a CSS class that won't be re-used, I still find it considerably uglier and harder to read than regular inline styling.
I've also learned that the OG in OG Images stands for open-graph, which refers to the preview cards that display when you share a link on social media. The more you know!
fin